Custom Leather Patches: A Practical Guide for Modern Brands
You know the drill. The cap mockup looks fine on screen, the tote is clean, the hoodie is solid, and somehow the whole drop still feels forgettable once it lands in someone's hands. That usually isn't a fabric problem. It's a finishing problem, and custom leather patches are one of the few details that can change how a team drop reads before anyone even tries it on.
Table of Contents
- Debossed feels restrained and premium
- Embossed adds tactile presence
- Laser engraving handles fine detail best
Why Custom Leather Patches Change How People Treat Your Merch
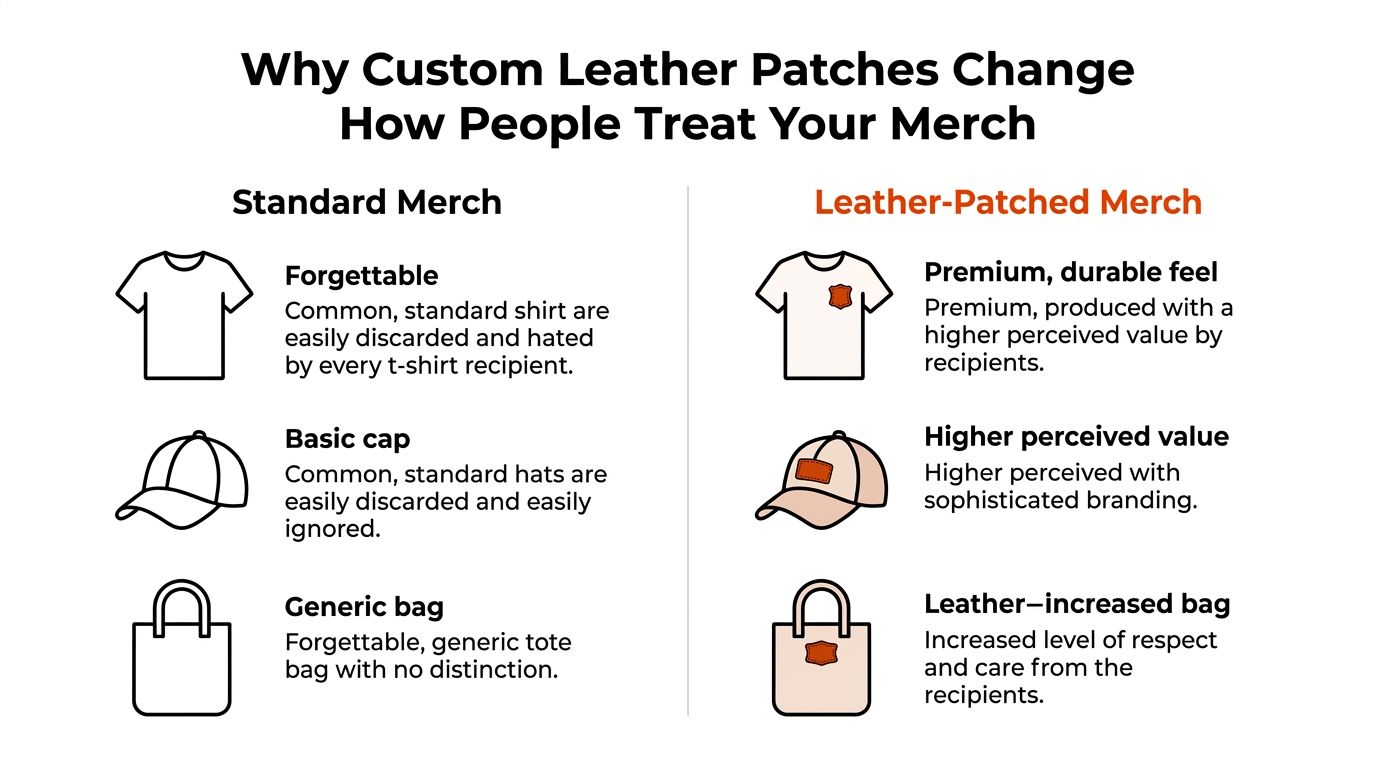
The fastest way to make merch feel disposable is to make it look printed and generic. The fastest way to make it feel intentional is to give it a material detail that people can see and touch, and leather does that better than most options. The broader embroidered badges and patches market was estimated at $3.21 billion in 2024 and is projected to reach $5.67 billion by 2033, a 6.8% CAGR that signals this category is a real part of the global customization economy, not a novelty lane for hobbyists or one-off crafts. That scale matters for teams choosing between a plain blank and something with more permanence, because leather patches sit inside the same branding, uniform, headwear, and fashion ecosystem that keeps this category growing industry statistics.
A leather patch changes the read of a garment the second it appears on the front panel, hem, or pocket. On a cap, it makes the piece feel less like event stock and more like a product. On a jacket, it signals weight, durability, and a brand that paid attention to the last 5% of the build.
The historical context is part of the appeal. Patch traditions go back to ancient societies, modern military patches were formalized in 1918 when the U.S. Army authorized shoulder sleeve insignia during World War I, and leather patches became more visible in the early 20th century through denim and workwear branding before moving into youth culture and fashion in the 1960s–1970s history of custom patches. That lineage is why leather still reads as a signal of identity and permanence, not just decoration.
Practical rule: if the garment needs to survive repeated handling, shipping, and wear, leather is usually a better finishing choice than a flat print when the goal is perceived value.
Choose the substrate with the end use in mind
Genuine leather brings natural grain, tonal variation, and patina over time. That aging can be the whole point for heritage-style drops, motorcycle-inspired pieces, and anything you want to feel less polished and more lived-in.
Faux leather and vegan leather are the safer route when consistency matters more than character. They're the better fit for tight brand color control, cleaner repeatability across a run, and drops where an animal-free material is a brand requirement. Leather patch design guides also note that leather patches can be made in either genuine or faux leather, with debossed, embossed, or laser-engraved decoration methods NYCL design guide.
Thickness and size matter more than teams expect. STAHLS lists genuine leather patch specs with a minimum area of 0.5" x 0.5", a maximum area of 6" x 6", and thickness at approximately 1.5 mm STAHLS leather patch specifications. If you're looking at a sample, that thickness is part of why the patch feels substantial instead of flimsy.
For teams planning a drop, the leather decision usually sits inside the larger merch strategy. If you're also thinking about layout, placement, and how the piece gets worn in the wild, the reference on how to advertise clothing lines is useful because it treats apparel as a visual system, not just a logo carrier. And if the rest of the drop needs to stay cohesive, the best swag ideas guide is a sensible cross-check before you lock the patch direction.
Deboss, Emboss, or Laser-Engrave
The decoration method decides whether the patch reads quiet, tactile, or sharply detailed. A lot of people start with the logo and forget that the method changes the emotional temperature of the piece. On leather, that matters as much as the artwork itself.
Debossed feels restrained and premium
Debossing sinks the design into the leather surface. The result is subtle, low-contrast, and easy to wear on pieces that should feel refined without shouting.
That makes debossing a strong fit for clean wordmarks, minimal crests, and founder merch that needs to look like it belongs in a premium capsule rather than a promo box. It's the move when the patch should blend into the garment instead of becoming the loudest thing on it.
Embossed adds tactile presence
Embossing raises the design, so the logo sits proud of the surface and picks up light differently. It reads more tactile and a little more old-world, which works well for heritage branding, clubs, and statement pieces.
If you want the patch to feel like a badge, embossing is the one that gives you that coin-like presence. It can be the right call for leather pieces on jackets, bags, and accessory items where touch is part of the experience.
Laser engraving handles fine detail best
Laser-engraved leather gives you crisp linework and fine text. It's the most practical choice when the logo has tight geometry or when the mark needs to stay legible at a smaller size.
Production limits still apply. STAHLS' specification sheet says the smallest character should be at least 1 mm tall, and individual design elements should be at least 0.3 mm wide STAHLS leather patch specifications. That's the number that saves a proof from getting wrecked by over-detailed artwork.
A good source of confusion is material choice versus decoration choice. Genuine leather tends to reward deboss and emboss with richer surface character, while faux and vegan leathers are usually the cleaner fit when you want repeatability and a more controlled finish. If you need a deep technical overview of engraved methods, the laser engraving guide is a good companion read.
If the logo only works when it's huge, it probably isn't a leather-patch logo yet.
Here's the practical filter: choose deboss when restraint matters, emboss when tactile presence matters, and laser engraving when detail matters. Don't pick based on the mockup alone, pick based on how the patch should feel in hand and how it needs to age on the garment.
Pick the Backing That Matches How It Gets Used
The backing is where a nice-looking patch survives or fails. This is the part most buyers skip, then they wonder why the patch curls, lifts, or gives up after a few washes. The attachment method should follow stress, laundry frequency, and the substrate it's landing on.
Match the backing to the garment
Sew-on is the safest default for heavy-use apparel. Heat-seal, or iron-on, is convenient for quick application and lower-touch pieces, but it trades durability for speed. Adhesive is better for temporary use or display, while rivets and snaps make sense where the patch needs a more hardware-like attachment on bags or leather goods.
DIY guidance from leather patch makers also points out that roughening the bonding surfaces and letting the adhesive get tacky for 3–5 minutes before clamping helps the bond, then the patch needs 24 hours to cure properly Everlighten leather patch guide. That same guidance also notes that iron-on is faster but less durable under frequent washing or heavy stress.
Attachment method by end use
| Method | Best For | Durability | Production Note |
|---|---|---|---|
| Sew-on | Jackets, denim, workwear | Strongest for repeated wear | Best when the garment gets washed and handled a lot |
| Heat-seal | Caps, event merch, quick-turn drops | Moderate | Fast to apply, but not the move for rough treatment |
| Adhesive | Temporary installs, display samples | Low | Useful when the patch is not meant for long-term wear |
| Rivets or snaps | Bags, backpacks, leather-to-leather builds | Strong and hardware-driven | Good when stitching isn't the right visual or structural answer |
If the merch piece is for travel, bags, or hybrid accessories, the branded travel accessories piece helps frame why hardware and attachment choice should be considered together, not separately.
The short version is simple. If people will wear it hard, sew it. If people need speed and clean application, heat-seal can work. If the piece is temporary, adhesive is fine. If the item is a bag or leather accessory, rivets and snaps are worth a serious look.
Design Specs That Prevent a Rejected Proof
A proof usually fails for a simple reason. The logo was built for a screen, then handed to a material that has grain, depth, and a much lower tolerance for fine detail. Leather patch work rewards artwork that is set up for the substrate from the start, not art that gets forced into it later.
Build for the patch, not the original logo file
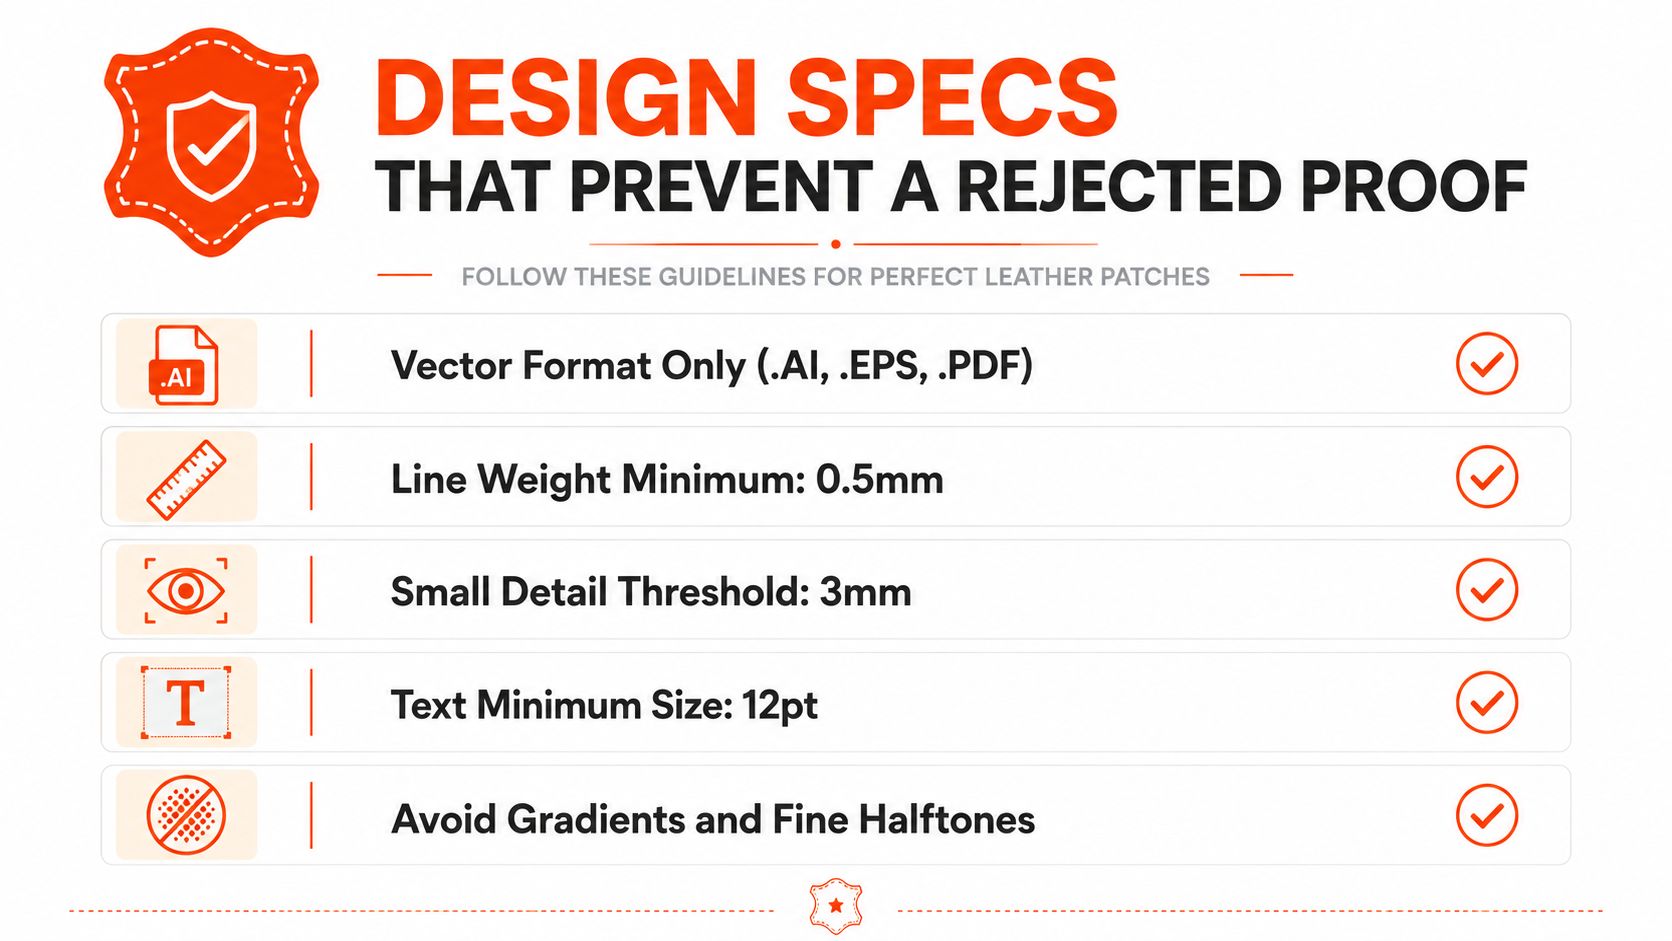
Leather patch specs put hard limits on what will reproduce cleanly. STAHLS' leather patch specifications call out a minimum area of 0.5" x 0.5", a maximum area of 6" x 6", smallest characters at least 1 mm tall, and design elements at least 0.3 mm wide. Those numbers are the difference between a proof that moves and a proof that gets kicked back for cleanup.
Vector files are the safest starting point because they hold edges, curves, and scaled geometry without blur. From there, the test is contrast. Dark leather can absorb a weak logo fast, so the artwork has to stay legible on the exact substrate you chose, whether that is a jacket chest, a cap front, or a bag panel.
A patch should also be drawn for the end use, not just the brand mark. Jackets can carry a little more visual weight, caps need a tighter footprint and cleaner read at distance, and bags give you more room for shape and hardware-driven placement. If the design team needs help turning a logo into something production-ready, custom design services are worth bringing in before the proof stage starts burning time.
Production rule: if the smallest part of the logo cannot be read at a glance in black and white, it probably needs simplification before it becomes a patch.
Keep the proof process clean
A clean proof starts with a clean handoff. Send the vendor a print-ready file, a clear size target, and the backing choice you plan to use, and the first mockup is far more likely to land close to final. That is the practical difference between approving a sample and getting trapped in avoidable revisions.
The same discipline shows up in packaging art. The Packaging Panda print-ready artwork guide follows the same logic, vector first, detail second, decoration third. Leather is less forgiving than paper or board, so sloppy art gets exposed faster.
The most common mistake is drawing for maximum detail and assuming production can rescue it. Clean up tiny interior shapes before the proof, keep the patch shape part of the design, and choose a silhouette that matches how the item will be worn. A square, circle, shield, or custom die-cut each changes how the logo sits on the garment, and simpler shapes are easier to place consistently on caps, jackets, and bags.
Ordering, MOQ, Pricing, and Production Timeline
A leather patch order should follow a controlled production path. Design intake comes first, then method selection, proof creation, sample approval, mass production, cutting and finishing, backing application, and final inspection. That order matters because the sample stage catches readability, edge quality, and color balance problems before a full run starts, as outlined in the production workflow guide.
What a sane workflow looks like
Start with a brief that matches the end use. The vendor needs the final garment, patch size, decoration method, and backing choice, otherwise the proof usually takes more rounds than it should.
The sample should be approved before the larger run. The workflow guide notes that one manufacturer inserts a sample stage before mass production, and another supplier provides a physical sample for orders over 250 pieces before the run. That is the point where small problems stay small, and where a jacket badge, cap patch, or bag label can be checked against the actual substrate instead of a screen mockup production workflow guide.
What to ask before you approve a quote
- Ask what's included: proofing, sample handling, cutting, backing, and final inspection should all be spelled out.
- Ask what can move the price: size, decoration, and backing are the main levers.
- Ask how the sample is handled: if you do not get a chance to check readability and edge finish, you are guessing.
- Ask whether the order is being built for the garment or just for the patch: those are not always the same thing.
- Ask about minimums early: low-MOQ tests change how fast a team can trial a patch on a jacket, cap, or bag before scaling, which is why the custom apparel no minimum page matters for first-run planning.
Quote structure also deserves a close read. If you are comparing more than one concept, a tool like compare 3D AI pricing can help you see how pricing frameworks differ across custom production categories, even though leather patch buying still depends on size, backing, decoration method, and finishing choices.
A few practical notes from the vendor side matter here. Banger supports from 1 unit per item on most products with a 10-unit minimum apparel order, and its production runs typically complete in 10–15 business days end to end with rush options available. For a leather patch project, that kind of low-friction ordering helps when you need to test a badge on a jacket, cap, or bag before turning it into a full team drop.
Recommended Configurations by Garment Type
Start with the garment, not the artwork. Leather patches behave differently on a jacket, cap, bag, or kit, and the wrong build can look right in a proof but feel wrong in use. The best configuration matches the material, the attachment method, and the way the item will be worn or handled.
Jackets
For jackets, sew-on genuine leather or a premium faux leather patch with debossed or laser-engraved artwork is the safest configuration. A size in the 2" to 3" range usually sits well on the chest or hem without taking over the whole garment, as noted earlier.
Jackets take more abrasion than lighter apparel, so the attachment has to hold up over time. If the piece is meant to be worn across seasons, the patch should feel like part of the construction, not something added at the last minute.
Caps
Caps usually work best with heat-seal faux leather because the curved panel and lighter structure make application easier to control. Debossed artwork fits this use case well, since the lower-contrast finish stays readable without fighting the shape of the crown.
For a giveaway or a quick launch item, fast application can matter more than long-term wear. A premium cap drop can still justify sew-on construction if the cap build gives you enough room to place and secure it cleanly.
Bags and backpacks
Bags and backpacks can carry larger patches, thicker stock, and more hardware-driven attachment. Rivets, snaps, or sew-on all make sense here, depending on whether the bag is fashion-led or utility-led.
These pieces also tolerate bolder branding. The larger surface area lets the patch function more like a label than a small accent, which is useful when the goal is visibility on a tote, duffel, or pack.
Event kits and onboarding packs
For event kits and onboarding packs, thinner faux leather with heat-seal or adhesive backing is usually the cleanest production choice. It ships flat, applies easily, and keeps the first round of logistics simple.
That approach works well for welcome boxes, limited drops, and team mailers where the patch is part of the unboxing moment rather than a piece that has to survive heavy daily wear.
Quality Checks and Care That Keep Patches Looking Right
A good patch can still fail if the run is sloppy or the care instructions are vague. The first check happens before the shipment leaves production. Look at edge finish, color consistency across the run, the backing adhesion on a sample unit, and the visual match against the approved BAT, or e-proof.
The second check happens after the garment lands on someone's desk. For sew-on and heat-seal patches, tell recipients to wash cold, turn the garment inside out, avoid harsh detergents, and skip high-heat drying. Leather itself should be treated gently, and spot-cleaning is the safer move where possible.
What to inspect before shipping
- Edge quality: check for clean trimming and no rough burn marks.
- Color consistency: make sure the run looks uniform under the same lighting.
- Backing adhesion: test one unit before the whole batch leaves.
- Proof match: compare the actual run to the approved sample, not to memory.
A patch that looks perfect in the proof can still fail if the edge finish is sloppy or the backing choice doesn't match the garment.
If you're building a team drop and want one partner to handle the product choice, artwork, customization, and shipping without bouncing between vendors, Banger covers custom apparel and accessories with leather work, product previews, and production support. If the next step is simple, upload a logo, choose a product, and request a quote so you can see what a leather patch version of the drop looks like on the garment before you commit.
If you're planning a team drop, a founder gift, or a merch refresh that needs to feel more considered than a standard print run, start with the patch, not the mockup. Banger can help you turn that idea into a real production piece, with the substrate, backing, and finish matched to how people will wear it.